Monday, 5 August 2013

Understanding dates in Excel

We often need to work with dates in Excel.
Sometimes we want to record the date that something happened - we made a purchase, someone purchased from us, we issued an invoice, etc.  Other times we want to calculate using dates to work out for example, how many days since an event took place or what the date will be 28 days from now.

There are lots of things that Excel can do with dates but first of all it is important to understand how Excel works with dates.
When you see a date displayed in a cell, you are seeing a number with a date format applied to it.  Starting from 1st January 1900, each day is one whole number.  I am writing this blog on the 5th August 2013 which is day number 41491. Specific times of day are expressed as decimals  e.g. 12 noon on 5th August 2013 is 41491.5. This means that dates can be added and subtracted and used in formulas just like regular numbers, because as far as Excel is concerned they are just regular numbers.   

Of course Excel is more clever than that.  There are several built-in functions that allow you to work with dates.  Take a look on the Formulas tab in the Date & Time button to see a full list.  You can extract just the month or the year from a date, you can find the day of the week for any date, you can calculate the number of workdays (i.e. excluding weekends) between two dates or find the date that is a specific number of workdays from a given start date.  There are many more functions like these.

Excel also recognises dates as series which means that you can use the Autofill handle to complete a series of dates without having to type them all in.  The series does not have to be sequential days.  Try the following:

Enter today's date in a cell (Ctrl + ; is the quickest way to do this)
Click on the Autofill handle (the small square on the bottom right hand corner of the cell) and drag it over several cells to the right. 
You should find that Excel fills in sequential days. 


Before you click away from the selected cells, you will see the Autofill options button appear next to the selected cells.  Click on it.

You will see options to fill days, fill weekdays, fill months or fill years


Click on Fill months.  You'll see that the dates filled in now are the same day of sequential months

You can also fill in a custom interval between dates.
In a new row type in a date e.g. 01/01/2013.  In the next cell type in a date two weeks later e.g. 15/01/2013
Select both cells then drag the Autofill handle and Excel will continue to fill dates that are 14 days apart.


Now that you understand how Excel calculates dates you're ready for my next blog post where we will take a closer look at some of Excel's date functions.

Thursday, 7 March 2013

My Top 5 favourite Excel shortcuts


Most of you have probably discovered that in Excel there is the 'proper' Microsoft way to do things which usually involves clicking on buttons on the ribbon or mini-toolbars, and there is an easy way - the shortcut.  There are so many shortcuts available that even I don't know all of them.  However, I am surprised even when teaching advanced students, how some things that I do instinctively come as a big surprise to others.  Here are my 5 favourites:

  1. Select cells using the Shift and Arrow keys
Often in Excel you need to select a range of cells - a row or a column or an entire table.
The obvious method is to use the mouse to click and drag but one slip and you've selected something completely different and you have to start over again.
I prefer to select cells with the keyboard as it's quicker and more accurate.

Start by selecting the first cell in your range (i.e. the top left corner of your range).
Hold down the Shift key and use the Down Arrow.  Now you have two cells selected.
Keep holding down the Shift key and use the Right Arrow.  Now you have four cells selected.
You can keep using the arrow keys until you have the whole range selected

Or

You can hold down the Ctrl key too.
By holding down Ctrl + Shift and using the arrows your selection will automatically extend to the last cell with data in it.  So if you have a full row / column of data you can quickly and easily select all of it.  To select a whole table of data, hold down Ctrl + Shift, press the down arrow once, then the right arrow once and you have the whole table.

Gone too far?
Maybe you didn't want to include that Total row or column in your selection.  Release the Ctrl key, keep holding down the Shift key and use the up or left arrow to change your selection.

To summarise:
Shift + Arrow selects cells one at a time in the direction of the arrow.
Ctrl + Arrow moves the selection in the direction of the arrow to the end of a block of data.
Ctrl + Shift + Arrow moves to the end of the block of data, selecting all of the cells in between.

  1. Easily create a chart
Another keyboard shortcut for you.
To create a chart without having to click through the Insert tab simply select the data you want to use and press the F11 key.
This will create a new chart on a separate sheet.

  1. Double click the Autofill handle
One quick trick that often surprises my clients is the Autofill handle.  Most know that you can click & drag the handle to fill in a series or copy a formula down a column.  But double click on the handle and it will fill to the bottom of the column.  Excel looks in the column to the left and keeps filling until it finds a blank cell.

  1. Switch between worksheets
I use the keyboard quite a lot for regular commands like copy and paste.  I've got quite used to using Alt+Tab to switch between applications or between workbooks, but always found it a pain to have to use the mouse to switch between sheets in the same workbook.  One shortcut it took me a while to find is using Ctrl+PageUp or Ctrl+PageDown to switch between sheets.  Life is much easier now.

  1. Insert today's date
Sometimes you need to enter today's date.  It's quick and easy enough to type if you can remember it, but if you're anything like me you have to think about it and possibly even look it up. 
There are 2 ways to enter today's date in a cell

  1. Press Ctrl + ; (semicolon) to enter today's date in the current cell.  This is a static date stamp that will not change.  Use this where you want to show a fixed date e.g. the date a change was made to the data or the date something was purchase.
  2. Use the =TODAY() function.  This will change the date to whatever is the current date, so if you open the file again in a month's time, it will show the date in a month's time.  Useful if you are creating, for example, an invoice template which when the details are filled in will be saved in a static format such as PDF.  Next time the template is opened it will show the current date again.


I hope you found these tips useful.  
If you want to find out more about NIMBUS training and how I can help you to work more efficiently please visit my website www.nimbus-solutions.co.uk 

Jo Hansell
NIMBUS solutions


Thursday, 24 January 2013

OneNote - what do you do with yours?


Are you using it?  If not, why not?

If you are using Office 2007 or 2010 you have probably noticed a purple icon for an application called OneNote.  I'm always surprised how many people I speak to haven't even clicked it to see what it is.  After all, you’ve managed without whatever it is so far and you just don’t have time to figure out what it does.  So what is it?
OneNote is a project planning tool (which is very different from a project management tool).  It works like having an electronic notebook or scrapbook.  So whatever your project is – organising an event, writing a report, developing a new product – you can use OneNote to help.  And with many smartphones now having OneNote apps available, you can access your notes wherever you are.

What does it do?


Each OneNote notebook is made up of tabs along the top which you can use for your main categories, then pages down the side for your content.  All of your OneNote notebooks are shown on the left hand side so you can easily switch between them.
Your content doesn't have to be just words; you can add pictures, links, drawings, emails or entire web pages.  You can create to-do lists, jot down thoughts and questions, just about anything!  You can place content anywhere on the page - you are not restricted by lines and columns.
OneNote integrates with other Office applications: you can link an Excel spreadsheet, Word document or Visio drawing into your notebook.  If you receive an email relating to your project you can click the OneNote button on Outlook's ribbon to copy it to OneNote.  
The print menu in all Microsoft Office applications has an option to send to OneNote - this places the content in your notebook so you can annotate it easily.
When you create a new OneNote notebook you choose a location to save it.  Saving it to an online location will allow you to edit it on the move as well as sharing it with others that may be working on the same project.  Once you've created it, the notebook is live - changes are saved as you make them so there's no need to keep pressing the Save button.

Example


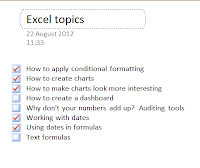
I use OneNote to organise this blog.  I have tabs for each category - Word, Excel, etc. and within each tab I have a Topics page, containing a checklist of topics I have thought of for that application.  I then create pages for each topic as I write it and tick them off on the checklist when they are completed.
If I find interesting articles on the web that I think I may want to write about I can send the page to OneNote and place it in the relevant section.

So when are you going to start using it?


I'm always amazed at how few people use OneNote or even know that it exists.  Every now and then I find someone that does use it and they don't know how they ever managed without it.
OneNote is incredibly versatile and is a great tool to help you plan any project, business or personal, and tie together all of your Office applications.  There are so many things it can do, and so many ways to use it, I could write about it all day!  Instead of that, why don't you open it up and take a look?  You should find a notebook already there called OneNote Guide which explains all the features and gives you ideas for how to use them.  
As always, NIMBUS solutions is here to help too.  If you want to know more about using OneNote or any Microsoft Office applications please get in touch.
t.  07733 341452
e.  info@nimbus-solutions.co.uk
w. www.nimbus-solutions.co.uk
Customised, Affordable IT Training.
For your business.  For you.